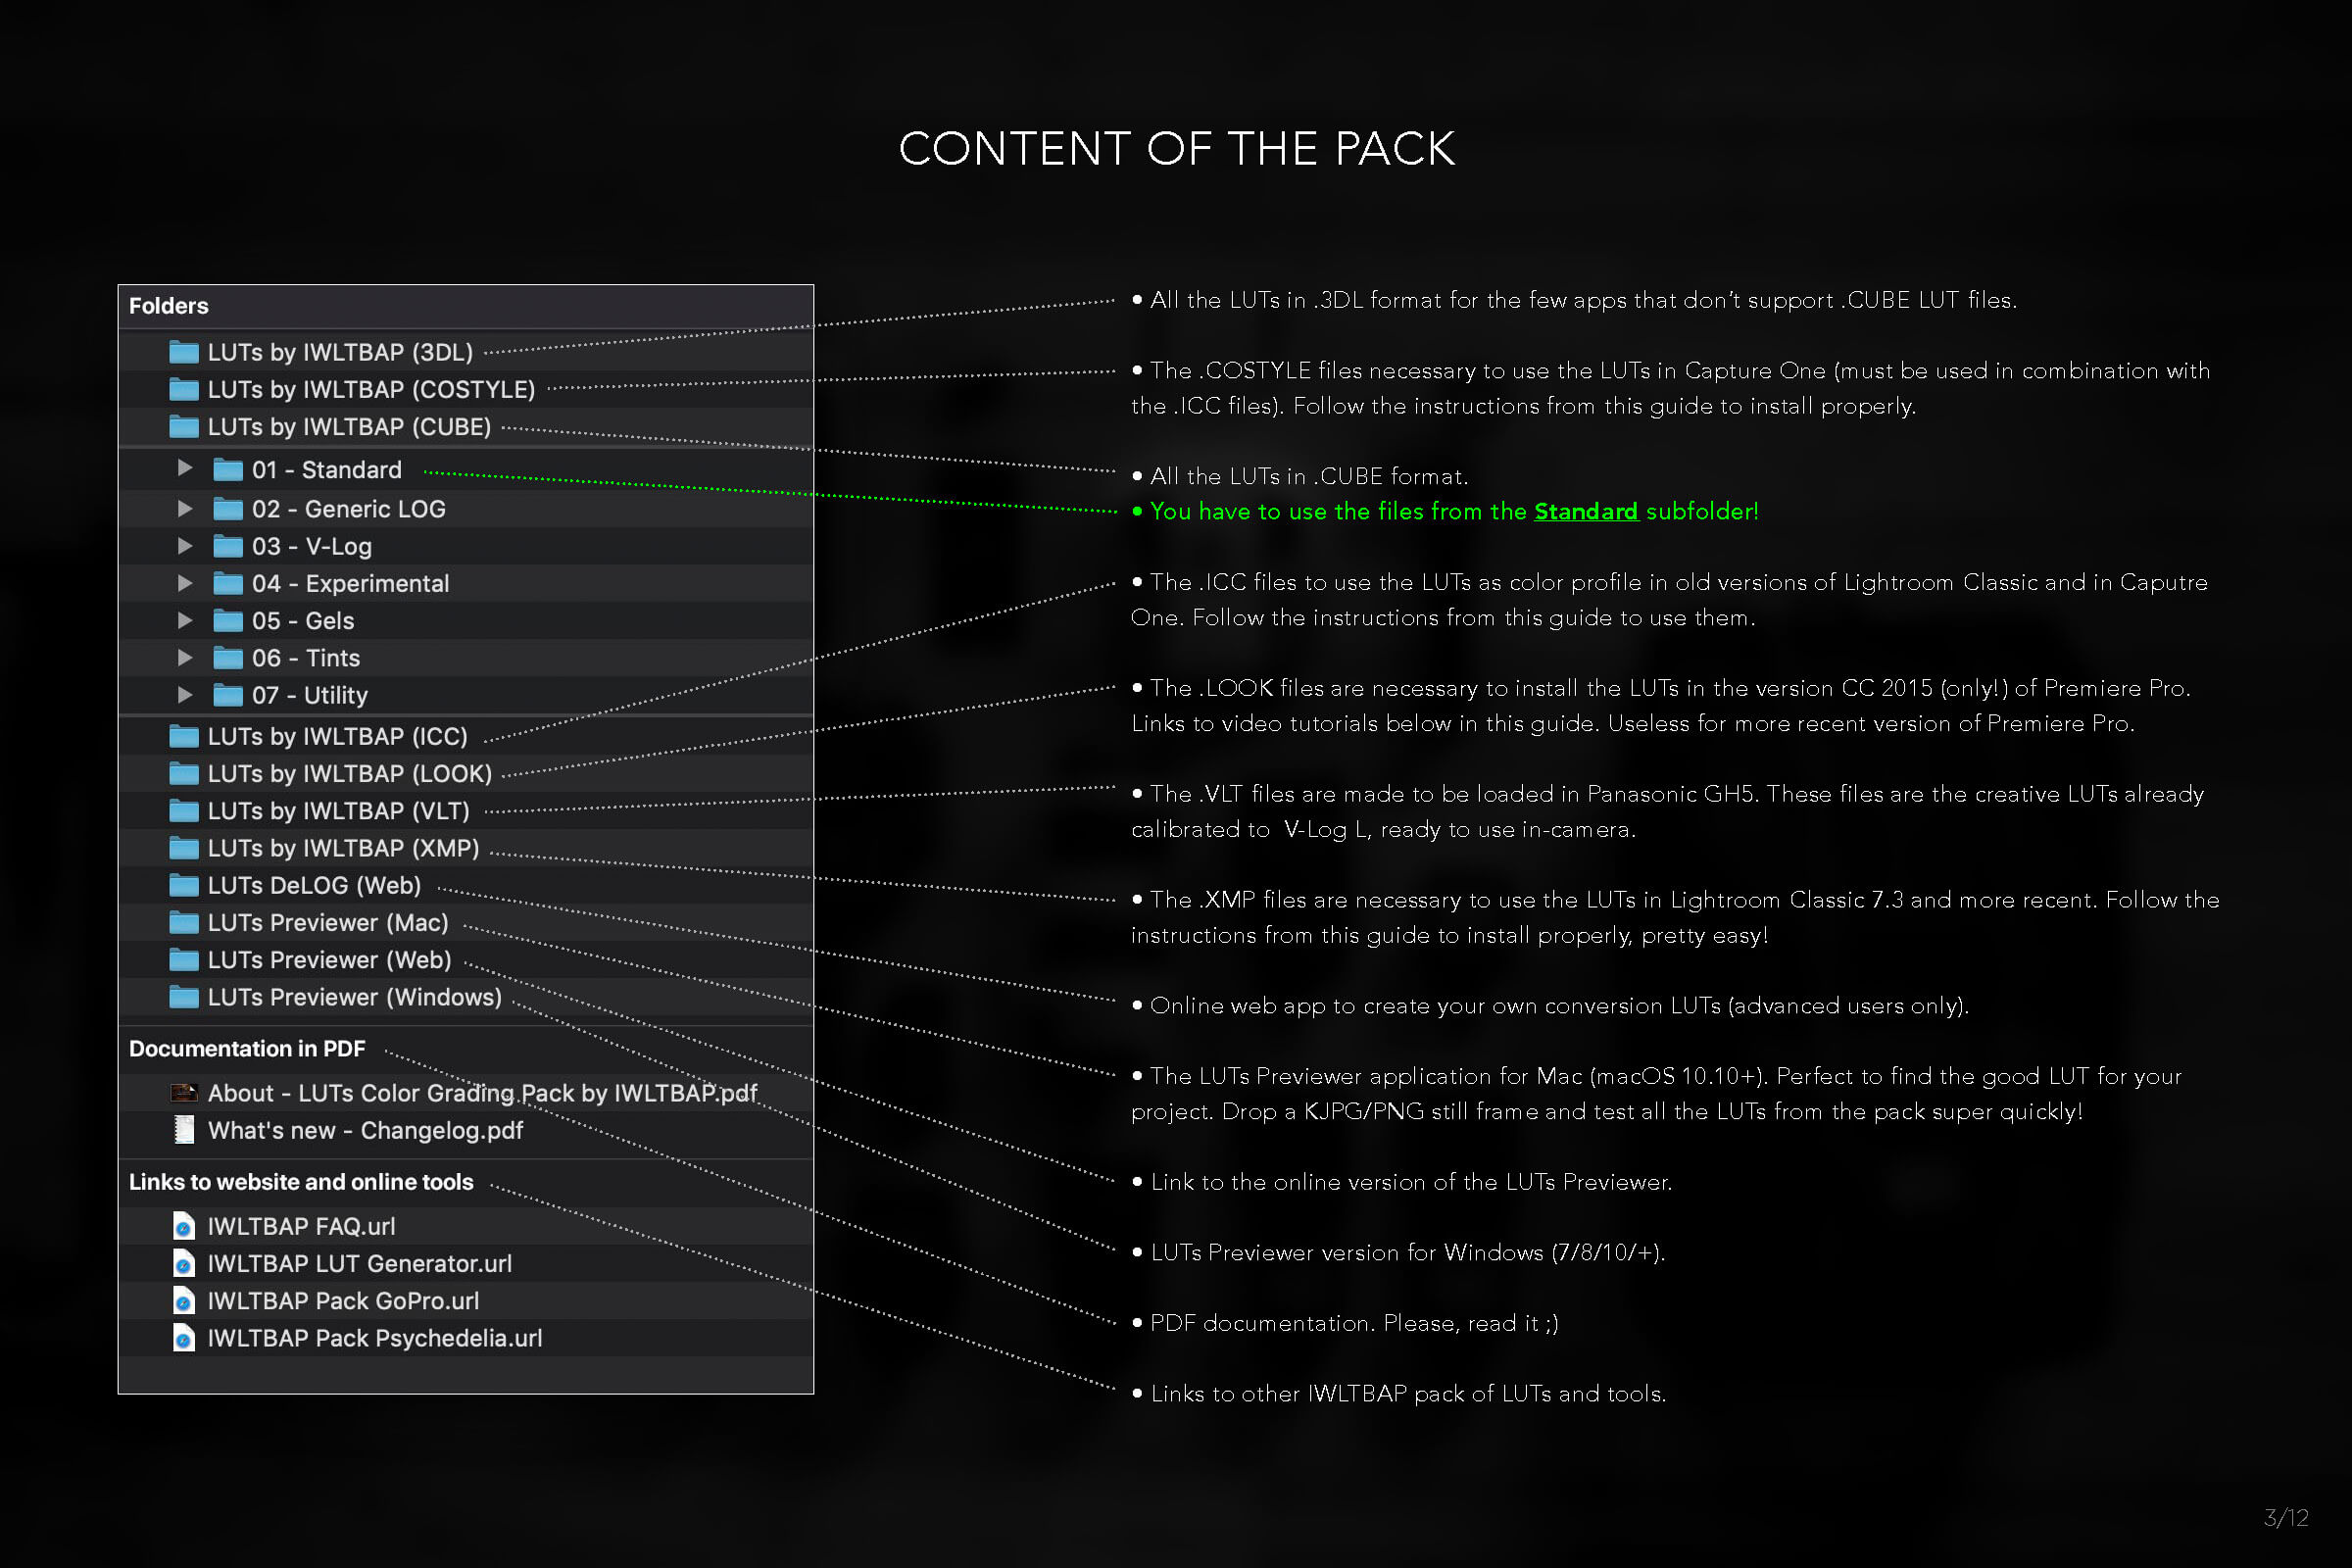
My pack contains multiple folders with the LUTs in two formats (.CUBE and .3DL), the UTILITY LUTs, the necessary files + instructions to install in Premiere Pro CC 2015, the LUTs Previewer (Mac/PC), LUTs DeLOG, etc.
The full pack is around 1.15GB (ZIP to download is 460MB).
You have to use the files from the folder LUTs by IWLTBAP (CUBE) > 01 - Standard.
FAQ
Please find below the answers to the most asked questions :)
– Concretely, what is in the pack?
– What is the difference between .CUBE and .3DL files?
– Are the LUTs compatible with my camera?
– What is the difference between STANDARD and LOG folders?
– Do I need to adjust settings in camera to use the LUTs in post?
– Will the LUTs works on my LOG footages?
– Do I have to shoot in RAW to use the LUTs in post?
– How to work manually with LOG footages easily?
– What applications are compatible with LUTs?
– How to install and use the LUTs in Capture One?
– How to install and use the LUTs in Lightroom?
– How to install the LUTs into Premiere Pro CC without troubles?
– Can I load the LUTs in my Panasonic GH5?
– Can I convert a Lightroom preset to a LUT?
– How to use the LUTs with X application?
– How can I create my own conversion LUTs?
– Are the LUTs from the GoPro pack compatible with other cameras?
– LUT Generator does not open on my Mac, why?!
– Are the updates free?
– Where can I learn color grading?
– Seriously, what is the meaning of IWLTBAP?!
-
Concretely, what is in the pack?
-
What is the difference between .CUBE and .3DL files?
The LUTs from my pack are available in two formats: .CUBE and .3DL. They are exactly the same thing, just in two different formats. Most applications supports the .CUBE format but few ones supports only the .3DL format.
-
Are the LUTs compatible with my camera?
My LUTs works with footages shot from all cameras (Canon 5D Mark III, Sony a7S, Panasonic GH4, Lumix LX100, Blackmagic Pocket, Blackmagic Cinema and Production 4K, RED Dragon, Arri Alexa, etc). They are optimized for standard image profile, with not too much contrast and not too much saturation, just neutral properly balanced image.
-
What is the difference between STANDARD and LOG folders?
The STANDARD folder contains the LUTs for standard image profile (named Rec.709), it's the most common profile on almost all cameras. You have to use these LUTs in most of the cases. The LOG folder contains the LUTs for flat image profiles (mainly pro cameras). It's a generic LOG. In the UTILITY folder you will find a large set of LUTs convert all LOG profiles to standard (Rec.709) optimized for my LUTs.
So, if you shoot in flat picture profile S-Log3, you have two possibilities:
1) using directly the LOG version of the LUT.
2) using first a conversion LUT from UTILITY folder (S-Log3 to Rec.709) and then a look LUT from STANDARD folder. -
Do I need to adjust settings in camera to use the LUTs in post?
My LUTs does not require special adjustments on camera. They are optimized for standard image profile, with not too much contrast and not too much saturation, just neutral properly balanced image.
-
Will the LUTs works on my LOG footages?
Yes of course. In my pack you will find the LUTs in multiple folders:
— STANDARD: the LUTs designed for standard image profile (Rec.709), for all cameras.
— LOG: the LUTs designed for LOG profiles (generic LOG).
— UTILITY: the conversion LUTs to convert all LOG profiles to standard (S-Log2, S-Log3, REDLogFilm, BMDFilm, Alexa Log-C, GoPro Protune, etc). -
Do I have to shoot in RAW to use the LUTs in post?
No it's not necessary. You can shoot in RAW, do the basic image balance and then apply a look LUT from my pack. The advantage of RAW is to have more flexibility on color correction before/after applying a LUT. Only pro cameras are able to shoot in RAW (RED, Arri, Blackmagic and Canon DSLR via Magic Lantern).
-
How to work manually with LOG footages easily?
You can do easily a manual conversion of your image from LOG to standard with DaVinci Resolve (free or paid version).
— Quick tutorial by The Post Color Blog: https://youtu.be/hIOxuVeHstA
The advantage of making the conversion manually is to enjoy the entire interest of LOG. You shoot in LOG to catch maximum details in highlights and shadows. So, in post-production, you can choose what details to keep or not in your image. Only you can know how your image should look like. Otherwise, you can just use an all-made conversion LUT. It will work, but it will not be optimized especially for your image. -
What applications are compatible with LUTs?
My LUTs can be used with the most photo and video editing softwares, on Mac and PC:
— Adobe Photoshop (CS6 and +)
— Adobe After Effects (CS6 and +)
— Adobe Premiere Pro (CS6 and +)
— Adobe SpeedGrade
— Adobe Lightroom (read note below)
— Avid Media Composer (7 and +)
— The Foundry NUKE
— DaVinci Resolve
— Assimilate Scratch
— Edius (8 and +)
— CyberLink ColorDirector (4 and +)
— Final Cut Pro X
— Sony Vegas (12 and +)
— Wondershare Filmora
— Capture One 10+ (read note below)
— Affinity Photo
— HitFilm 4
— and more
For Premiere Pro CC 2015.3, 2017 and more recent, here is how to install and use:
Mac: https://vimeo.com/197112054
Windows: https://vimeo.com/197124387
For Premiere Pro CC 2015 (not 2015.3), here is how to install and use:
Mac: https://vimeo.com/197127837
Windows: https://vimeo.com/197135144
For After Effects CS6 and Premiere CS6, you need Magic Bullet LUT Buddy (free plugin):
https://www.redgiant.com/products/magic-bullet-lut-buddy/downloads
For Final Cut Pro X, you need a LUT plugin like the free one by motionVFX:
https://www.motionvfx.com/mplugs-107.html
Or the LUT Utility plugin ($29) by Color Grading Central:
http://www.colorgradingcentral.com/lututility
Or the Color Finale plugin ($99) by Color Grading Central:
http://try.colorgradingcentral.com/colorfinale/
For old versions of Sony Vegas (Pro/Movie Studio), you need this cheap LUT plugin by VisionColor:
http://www.vision-color.com/lutplugin -
How to install and use the LUTs in Lightroom?
FOR VERSION 7.3 AND MORE RECENT:
Install the LUTs in Lightroom in two easy steps:
Watch this video tutorial OR follow the instructions just below.
1) Copy the .XMP files to the clipboard. They are located in the following folder of the pack:
2) Paste these .XMP files into the following folder of your computer:
- Mac: /Users/[username]/Library/Application Support/Adobe/CameraRaw/Settings
- Windows: C:\Users\[username]\AppData\Roaming\Adobe\CameraRaw\Settings
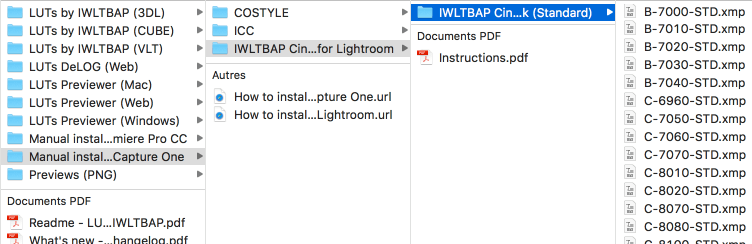
3) (Relaunch Lightroom) Now, in Lightroom, go to Develop tab and click the "four squares" icon as shown below:
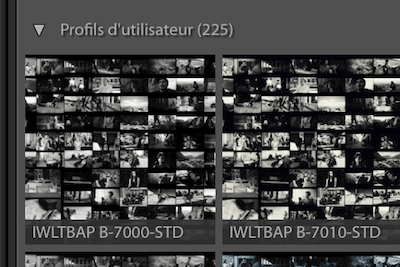
4) All the LUTs will be displayed under "User Profiles" section. Click on one thumbnail to apply the LUT. Done :)
FOR VERSION OLDER THAN 7.3:
Install the LUTs in Lightroom in five easy steps:
1) Copy the files with .ICC extension from the following folder of the pack Manual install for Lightroom and Capture One > ICC, into:
- Mac: /Users/[username]/Library/ColorSync/Profiles
- Windows: C:\Windows\system32\spool\drivers\color
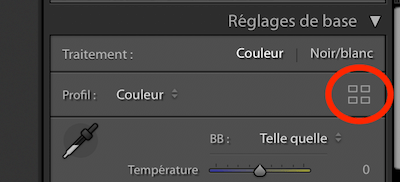
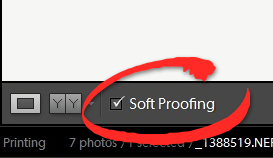
2) (Relaunch Lightroom) Now, to use the LUTs in Lightroom go to "Development" tab and enable "Soft Proofing" checkbox in bottom bar, as shown below:
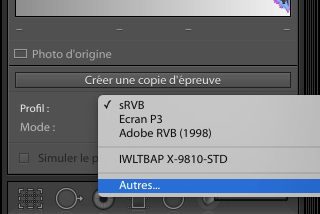
3) Then, in the top right area of your screen, click "Profile" dropdown menu and choose "Other...", as shown below: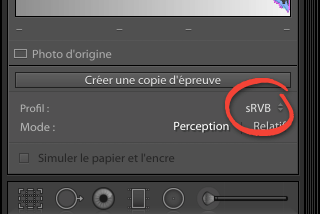
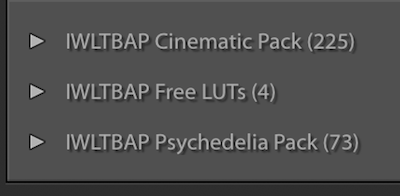
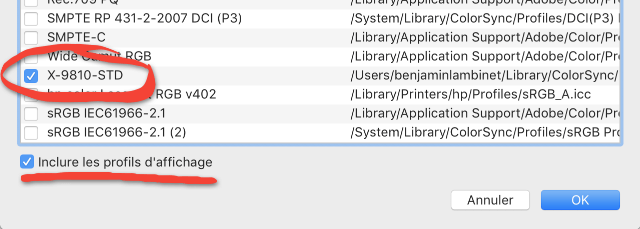
4) In the window that opens, enable all the LUTs that you want to use in Lightroom, as show below:
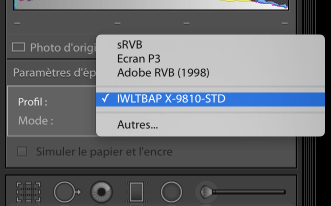
5) Now you can easily access the LUTs in one click via the "Profile" dropdown menu :)
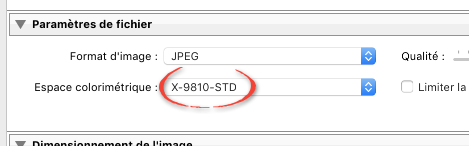
Note) If the LUT is not applied when you export the image, you have just to enable the LUT in Export settings (section File Settings > Color Space), as show below:
-
How to install and use the LUTs in Capture One?
To install the LUTs in Capture One you have just to copyt the Mac or Windows folder from LUTs by IWLTBAP (COSTYLE) into:
1) Copy the files with .COSTYLE extension from the following folder of the pack Manual install for Lightroom and Capture One > COSTYLE, into:
- Mac: /Users/[username]/Library/Application Support/Capture One/Styles
- Windows: C:\Users\[username]\AppData\Local\CaptureOne\Styles50
- Windows (alternative): C:\Program Files\Phase One\Capture One\Color Profiles\Common
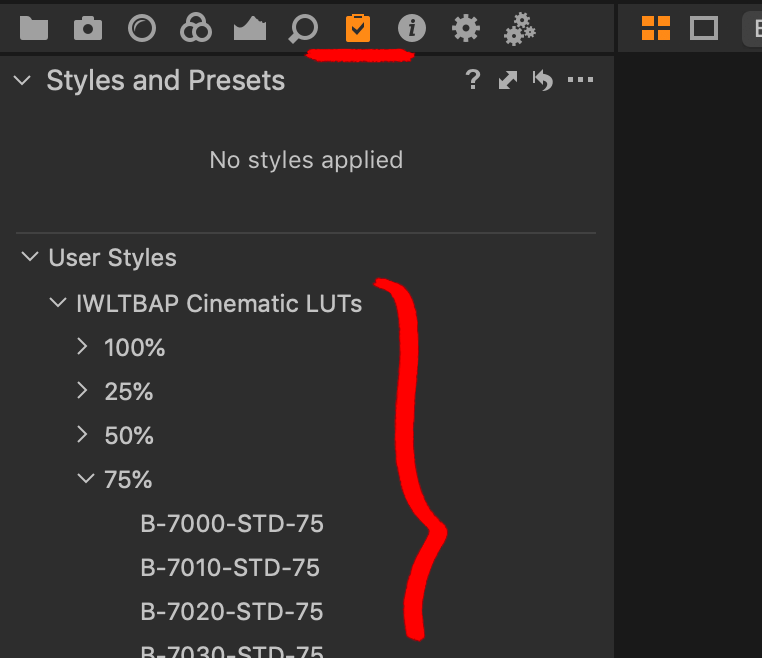
3) Restart Capture One! Now, to use the LUTs go to Styles and Presets tab and select a LUT in the User Styles section, as show below:
-
How to install the LUTs into Premiere Pro CC without troubles?
For Premiere Pro CC 2015.3 / 2017 and more recent, follow these videos:
- Mac: https://vimeo.com/197112054
- Windows: https://vimeo.com/197124387
For Premiere Pro CC 2015 (not 2015.3), please follow these videos:
- Mac: https://vimeo.com/197127837
- Windows: https://vimeo.com/197135144
For Premiere Pro CC (2014), please follow this video:
- Mac/Windows: https://youtu.be/PvjHqNlrCJw
If you want to install the LUTs in Basic Correction rather than Creative section of the Lumetri panel, just place the .CUBE files into:
— Mac: /Applications/Adobe Premiere Pro CC 2015/Adobe Premiere Pro CC 2015.app/Contents/Lumetri/LUTs/Technical
— PC: C:\Program Files\Adobe\Adobe Premiere Pro CC 2015\Lumetri\LUTs\Technical -
Can I load the LUTs in my Panasonic GH5?
In my pack is included the .VLT version of the LUTs, already profiled for V-Log L. So, yes, you can load the IWLTBAP LUTs in your GH5 (and all other compatible Panasonic cameras) very easily :)
Important: you can load maximum 4 LUTs in the GH5. Also, the filenames must be maximum 8 characters, otherwise the LUTs will be hidden in-camera.
If you want to convert your own LUTs to .VLT format for the GH5, please follow this video tutorial using LUTCalc (online web application): https://youtu.be/aUt0qMJCMb4
I highly recommend the LUT made Paul Leeming to convert V-Log L to Rec.709 (standard). The conversion LUT is also available in .VLT format (not sponsored): http://www.leeminglutone.com -
Can I convert a Lightroom preset to a LUT?
Yes you can! I just made an utility application to achieve this, named LUT Generator. Please find below a video tutorial that explain the complete process.
-
How to use the LUTs with X application?
Please find below a list of video tutorials for the most used applications. Feel free to search for new video tutorials on YouTube and Vimeo, there are a lot of resources available around the web :)
For Premiere Pro CC 2015.3, 2017 and more recent, here is how to install and use:
Mac: https://vimeo.com/197112054
Windows: https://vimeo.com/197124387
For Premiere Pro CC 2015 (not 2015.3), here is how to install and use:
Mac: https://vimeo.com/197127837
Windows: https://vimeo.com/197135144
How to use in Adobe Premiere Pro CC (2014):
https://youtu.be/PvjHqNlrCJw
How to use in Adobe Photoshop: http://ow.ly/ZpqZy
How to use in Adobe After Effects: https://youtu.be/_39GzdjZKmA
How to use in Adobe Premiere Pro CS6 with LUT Buddy: https://youtu.be/hrSbtqLIamE
How to use in DaVinci Resolve: https://youtu.be/R_PPxcNeYZg
How to use in Final Cut Pro X with LUT Utility: https://youtu.be/xlm-Wqdmu4A
How to use in Final Cut Pro X with mLUT: https://vimeo.com/151515697
How to use in Final Cut Pro X with Color Finale: https://youtu.be/9SodZwwyCeM
How to use in Assimilate Scratch: https://youtu.be/p34z7SlmlLI -
How can I create my own conversion LUTs?
Using my utility named LUT Generator you can create your own conversion LUTs easily (to convert your LOG footage to standard):
-
Are the LUTs from the GoPro pack compatible with other cameras?
Yes. The LUTs from the GoPro pack are optimized for GoPro and action cams but they work with footages from all cameras. You may have to make few adjustments about contrast and brightness, as GoPro footages are often shot in natural highlights. Feel free to test the free GoPro LUT on your footage.
-
LUT Generator does not open on my Mac, why?!
I have a problem with Mac OS X 10.9.5. When I built the application I specified Mac OS X 10.8 as minimum OS version but it seems that Apple forces developers to build app for the lastest OS X version only :/
Solution: In this case please use the application inside folder named LUT Generator (Mac Beta).
Extract the app and the two PNG from the DMG. Now you can load one PNG (Neutral-125.png or Neutral-512.png) into your favorite color correction application (Lightroom, Photoshop, etc) and then export in JPG or PNG with minimum compression. Do not resize the file! Then open the app IWLTBAP LUT Generator (Converter).app and select the modified PNG. A LUT in .CUBE format will be generated close to the PNG file.
For experienced users only: another solution is to use LUT Generator via command-line using the Terminal. Do right-click on the IWLTBAP LUT Generator.app and choose "Show package content". Navigate to IWLTBAP LUT Generator.app/Contents/Resources folder to find the two sizes of PNG HALD (Neutral-125.png and Neutral-512.png).
Now to convert a PNG HALD to .CUBE 3D LUT use the following command-line : ./generator <path-to-your-png-hald> <path-to-cube-lut>
— generator is the path to the file named "generator" inside the application package content.
— <path-to-your-png-hald> is the path to your .PNG HALD file.
— <path-to-cube-lut> is the same path as your .PNG HALD file but with .CUBE extension.
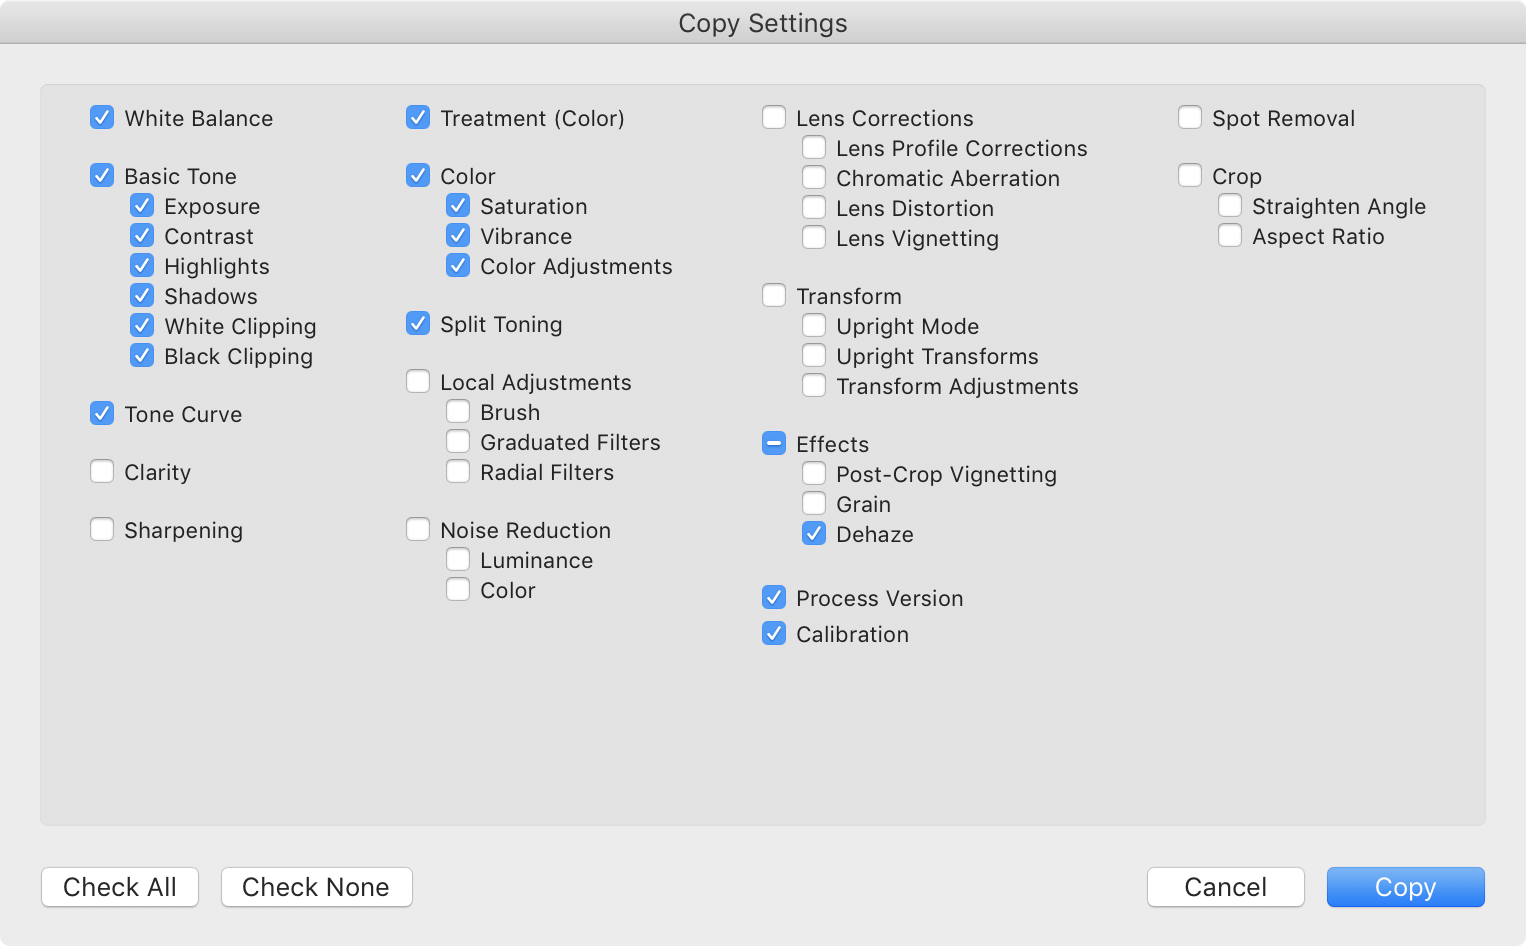
Only the following settings can be enabled when yuo apply a preset on the PNG HALD:
-
Are the updates free?
Yes, all updates are free for customers! I publish an update each one or two months. At each new update you will receive an email containing a download link to get the latest version of the pack. If you have not received the email or if the link has expired, just contact me.
-
Where can I learn color grading?
If you want to learn color grading, I suggest you to check the Facebook groups named Color Grading Central and DaVinci Resolve Users. With these groups you will be able to learn a lot and share your productions with many people from all around the world. About forums, I recommend the great EOSHD Forum by Andrew Reid and the very professional Lift Gamma Gain. Keep in mind that colorist is a job that requires a lot of experience :)
-
Seriously, what is the meaning of IWLTBAP?!
I would like to be a pony.